How to Create Silk Paper by Nancy Ballesteros
Silk paper is capable of capturing the intense lustre and beauty of silk fibres but it is not considered a true sheet of laid paper. A shimmering sheet of the silk paper is created by simply laying down unspun fibres and ‘gluing’ them together. Various forms of adhesive mediums are used as the glue.
The original concept was passed down by a felter and papermaker from Holland, Inge Evers, who originally incorporated silk paper into her felt. In 1995, when I first heard about the concept of silk paper, I immediately realised it could have a much broader application. I have since spent many years researching various adhesive mediums that would allow silk paper to be utlised in many other art forms – there are both permanent and non-permanent options. Now it is truly amazing to witness the limitless application that textile artists have found for silk paper – feltmakers, machine embroidery, three-dimensional sculpture, jewellery, wearable art, quilting, book coverings, collage, home furnishings, and mixed media to mention a few – limited only by the artist’s imagination![accordion][toggle title=”Silk Fibre Characteristics”]
Silk is spun by a caterpillar as a semi-liquid, continuous filament that hardens on contact with air. The smooth surface of the silk fibre reflects light, and this reflected light is seen as lustre. Silk is processed and sold in many forms.
There are two major types of silk fibre depending on which species of caterpillar spins the silk. The Bombyx mori extrudes a pure white silk that is very fine and highly lustrous and is commonly known as mulberry silk. The Chinese Tussah silk worm spins a lovely, honey-coloured fibre which is slightly coarser and less lustrous, but also less expensive.
Recommended Fibre Types
Silk Tops – To create a paper with lovely lustre and strength you should purchase silk in a ‘top’ preparation. A ‘top’ has been both carded and combed so that all the fibres are aligned perfectly parallel and are of a specified length. Make sure when purchasing the tops that the staple length is at least 3-4 inches (7.5-10cm) – the longer the better. Other fibres and materials that may be of interest are listed below.
Seri Silk Tops – These Bombyx (Mulberry) Silk tops, exclusive to Treetops, posses a higher than normal Sericin content. Sericin is the natural glue extruded by a silkworm that holds their cocoon together. It’s because of this extra sericin that you are not able to draft these silk tops in the normal fashion; however, they make amazing Silk Paper! See our separate instructions below for how to create Temporary Seri Silk Paper for Felting.
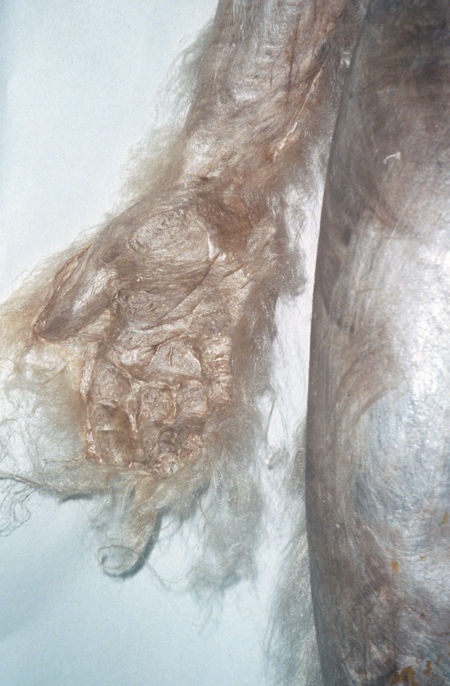
Silk Throwsters Waste – Very long, lustrous strands of tangled spaghetti-like white silk filament. Great texture!
Silk Hankies – Individual cocoons are spread over a small frame forming a cobweb-like square of fibres. Individually they are gossamer thin or use several layers together to make a more textured surface. Very versatile!
Other Fibres – Fibres other than silk that may produce interesting textures and surfaces are hemp tops, ramie tops, flax (linen) tops or line and mohair tops. Fine open-weave fabrics of various textures and fibre types (such as silk organza) may be of interest to use as a middle layer to add internal strength to your project or to act as a background onto which you lay the silk.[/toggle][toggle title=”How to Begin”]
Quantity of Silk
Approximately 50gms of silk tops will make two sheets of paper of medium thickness 16″ wide x 30″ long (40 cm x 76 cm).
Laying Down Silk Tops
Begin by laying out the silk fibre on top of the plastic if you are making a permanent sheet, or grease proof paper for a temporary sheet for feltmaking. Pull off a manageable length from the silk top (say 6-12 inches) and strip it lengthwise as many times as needed to be easily manageable. Then use the palm of your hand to hold down the end of the silk top on the tulle and pull out a length of fibre approximately 1/2″ to 1-1/2″ wide by 3″ to 4″ long (see Figure 1).
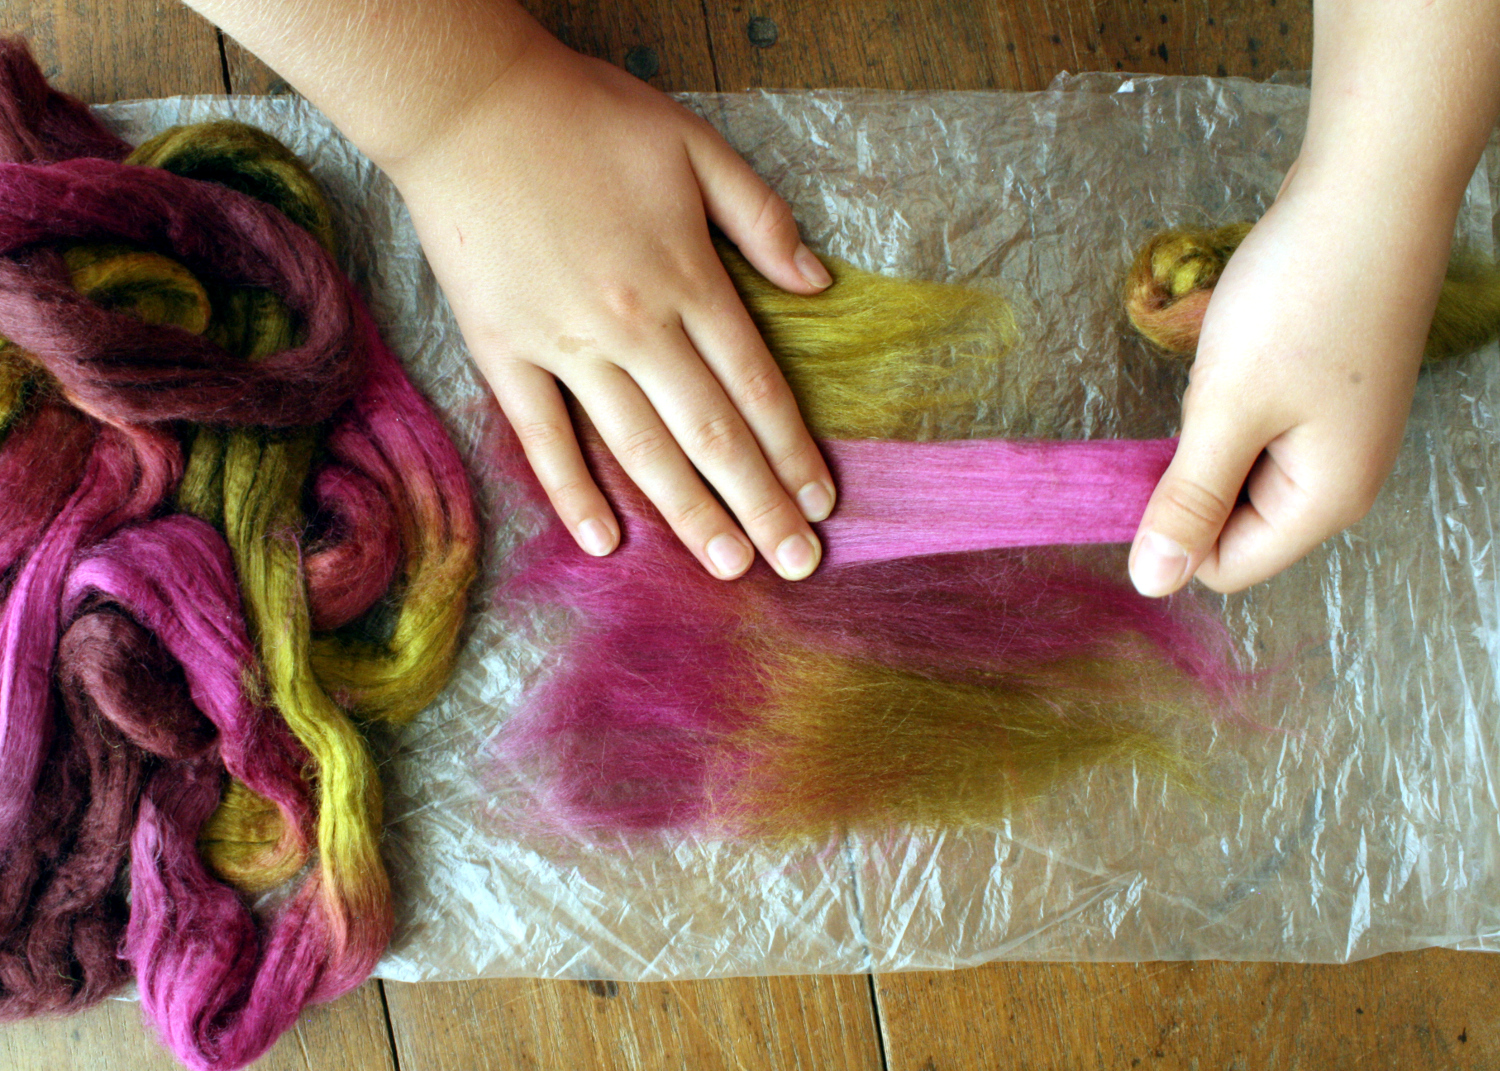 Figure 1
The length of fibre laid down at any one time is directly related to length of the individual fibres in the top. Continue laying down fibre in this manner – being sure that the fibres are slightly overlapping each time. I usually begin in the upper right hand corner of the sheet and work downwards towards me then, on the next row, move back up away from me. In subsequent rows it is imperative to place your palm on top of the previous row, so that each new row overlaps approximately 1 1/2″ to 2 1/2″ on top of the previous one. You should not be able to see the tulle underneath the silk. Continue laying down the silk until it reaches your desired dimension. The paper’s thickness is dependent upon the amount of silk you place in any one spot. Sampling is the best way to determine the correct thickness for a particular use.
There are several things to keep in mind to improve your results. Firstly, the strength of the sheet of paper is along the length of the fibre (the fibres are more likely to pull away from one another crosswise than lengthwise). If you need your paper to be strong in all directions (such as in wearables) lay down three separate thinner layers. The middle layer is placed at right angles to the top and bottom layers.
Secondly, the highest possible lustre is obtained by keeping the fibres as orderly and parallel to each other as possible. Lastly, when laying out the silk, it is essential that your work area be completely dry. Static electricity can make the silk difficult to lay down evenly and orderly – patience will be needed. You may also apply an anti-static spray (sold to keep your dress from clinging to your stockings) to the silk, ensuring it is thoroughly dry before continuing. [/toggle][toggle title=”Making Permanent Silk Paper”]
Procedure – Making Permanent Silk Paper
It is easiest to work on fairly heavy sheet of plastic. You may eventually want to move the silk outside to dry in the shade so cut the plastic to a manageable size. First lay down a piece of tulle (netting) twice as big as your project (so as to sandwich the sheet of silk paper). If your silk tops were hand-dyed it may need to be given a few tugs along its length to loosen up the fibre (silk becomes stiff after being wet).
After your silk is laid down, cover the top with the tulle. The next step is to wet out the silk so that it will easily accept the adhesive agents. Silk fibre has a great tendency to repel water, so to help break its surface tension, paint the silk with a solution of soapy water (see Figure 2). A paint brush about 2-3 inches wide works well. Any mild soap will do (approximately 1tsp per 4 cups water) or use Synthrapol (1tsp per 4 cups water) which is a wetting agent available from most dye houses. Place another sheet of plastic on top of the tulle and flip your silk over. Remove the plastic and add another piece of tulle so that your work is sandwiched in tulle. Now repeat wetting out on the other side. Wipe up any excess water gently with a sponge. Don’t worry about a bit of lather.
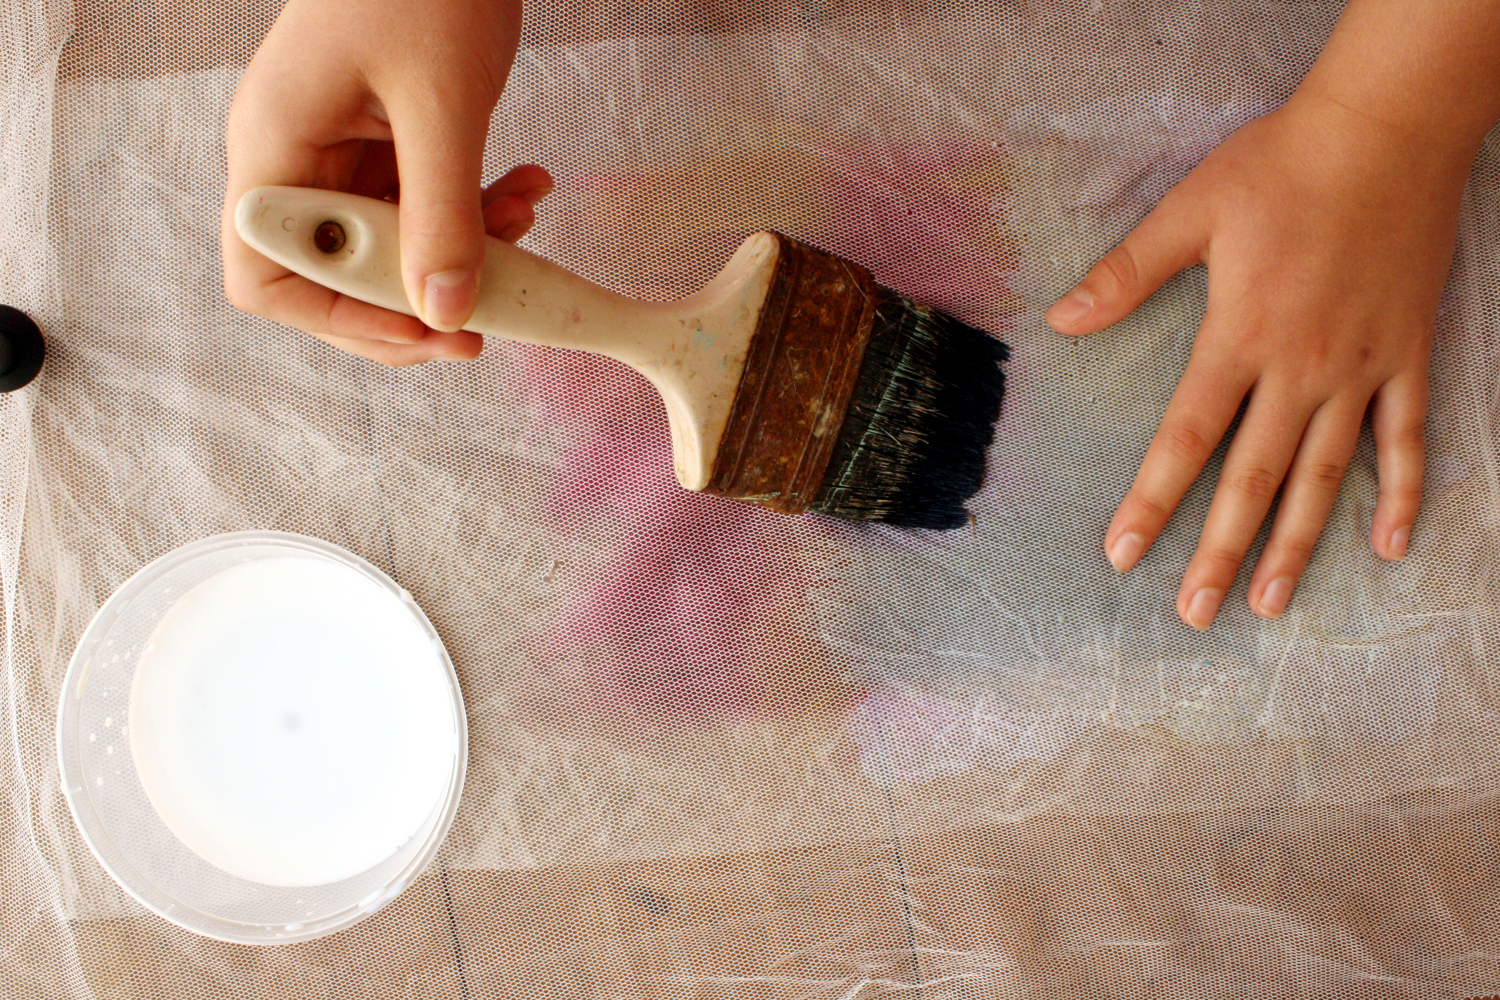 Figure 2
Applying the Adhesives
There are several adhesive agents that can be used to ‘glue’ the fibres together, depending upon your project. There are advantages and disadvantages inherent to each adhesive, so some experimenting on your part will be necessary.
To apply any of the following adhesives simply prepare as directed below and paint very evenly and thoroughly onto both sides of the silk paper (once the silk has been thoroughly wetted). After the adhesive has been applied to both sides it is best to remove the tulle and then move it off the plastic onto some type of screen (fly wire) to dry – otherwise your paper may become excessively shiny where too much adhesive settles out onto the plastic.
When dry simply peel the silk paper away from the tulle. Be sure the paper is thoroughly dry or it will be difficult to peel away from the tulle. You can then iron the paper (silk setting) under a pressing cloth to further flatten it. Drying times vary according to your paper’s thickness and the adhesive used, but generally allow over night. Never place silk in direct sunlight as this will cause degradation of the fibre.[/toggle][toggle title=”Sculpting and Designing with Permanent Silk Paper”]
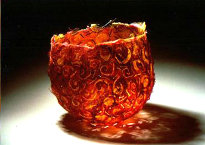
If you would like to sculpt the paper, after the adhesive has been applied to both sides and the tulle has been removed leave it on the plastic. Then with your fingers simply start manipulating the silk into any desirable shape (see Figure 3) or drape over a mould and leave to dry. If your mould is precious, cover with plastic wrap or simply create your own mould by scrunching up aluminium foil. Of course, proper cast moulds work well – mediums may stick to the mould if it has not been properly sealed or covered with plastic wrap. If you find the medium dripping off the moulded piece remember to dab up the excess as it is drying so that not too much medium accumulates (these drip areas will become very stiff and, once dry, it cannot be removed). It may be necessary to apply several thin coats to areas where the medium has drained off before it dries.
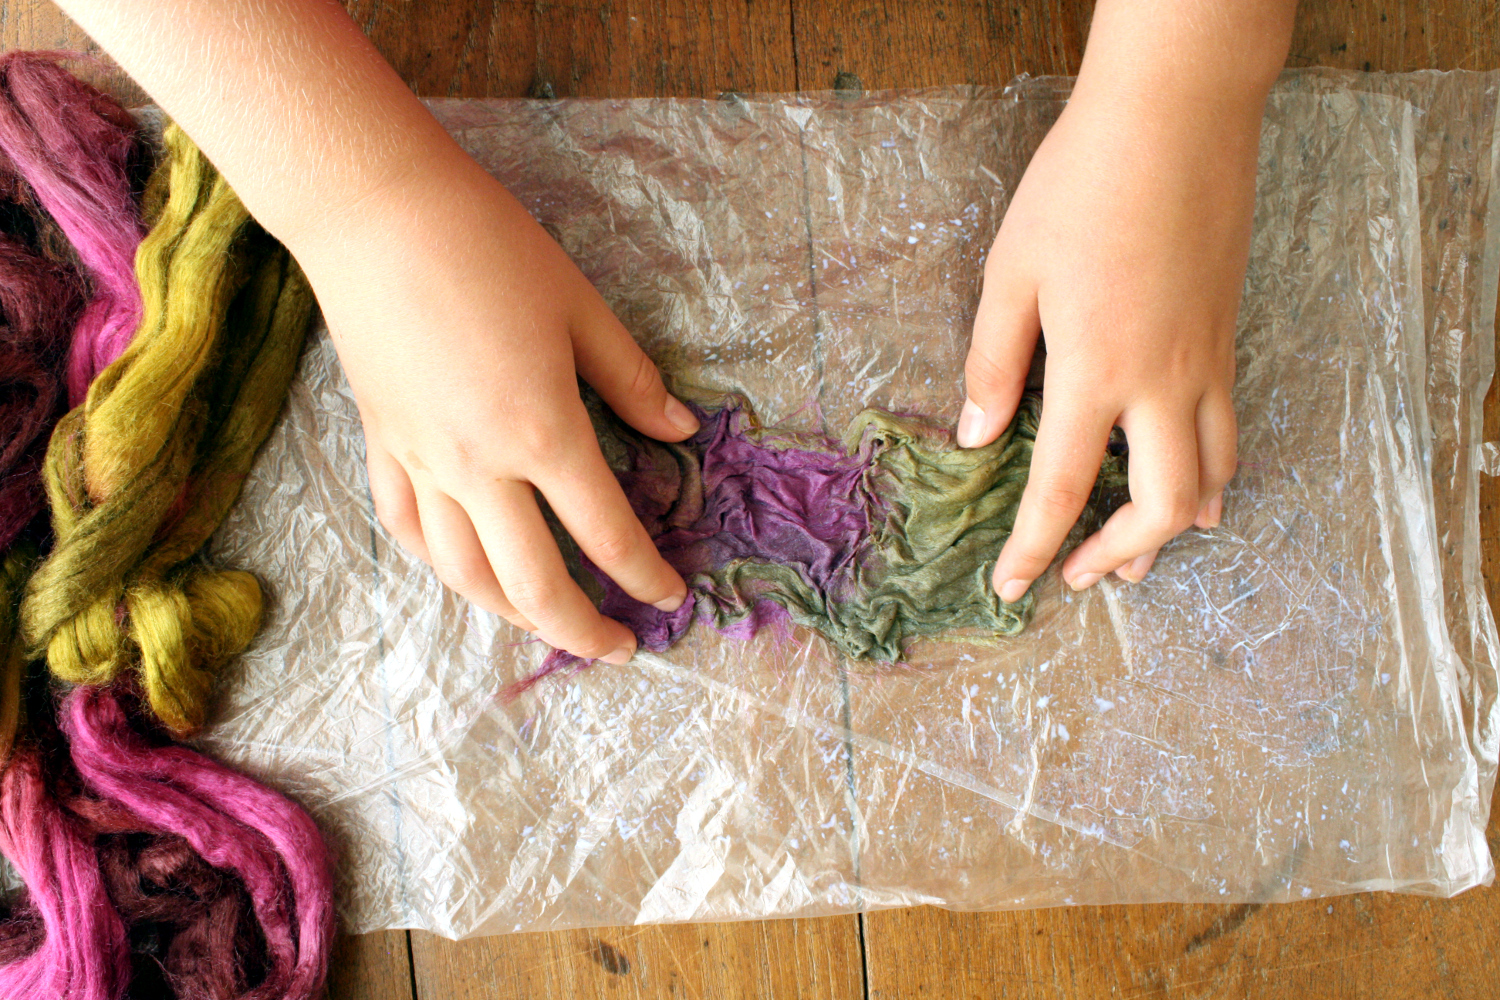 Figure 3
Design Variations
The method you use for laying out the silk will vary depending on the type of fibre preparation you use and the end effect you would like to create. Interesting surfaces can be constructed simply by throwing down tufts of silk at random or spreading out the fibres very fine like a cobweb. Try incorporating other materials like paperbark, feathers or threads in with the silk as you lay it down. Sandwich very fine woven or knit fabrics in between the top and bottom layers to create a fabric with greater overall strength and/or texture – great for wearables.
You can also simply lay down the silk on top a piece of finely woven fabric (like silk organza) to create an interesting design. If you are into 3-dimensional design incorporate fine wire or cords in between the layers of silk – then fold or bend into shapes. Silk paper is also fantastic to use as a drawing surface, using inks, oil pastels or acrylic paints to name a few. Silk paper can also be used for photo transfers, embossing or burn out techniques. Machine embroideries and quilters can create their own silk paper fabrics to use for embellishment.
[/toggle][toggle title=”Types of Permanent Adhesives”]
There are many art supply companies which produce various types of adhesive mediums. It is important to understand that each company has its own unique formula that may, or may not, work successfully with the silk. I have experimented with many different brands with varying degrees of success. Early in 1993, I began working with the chemist at Chroma Acrylics, a company that manufactures artist supplies, and together we have determined that the following two adhesive mediums will bond very successfully with the silk.
Acrylic Gloss Medium/Varnish (Atelier Brand, by Chroma Acrylics)
This adhesive is water-repellent, has enough stiffness for sculpting, jewellery, book coverings and mixed media but still leaves the silk with a crisp, but pliable, handle and is easily machine stitched. It is the more natural feeling of the two mediums.
To apply, see the above information and follow manufacturer’s directions. For sculptural effects use the medium without any (or very little) water added. For a paper with a medium stiffness try a 1:1 ratio of water and adhesive (i.e. 50mls of water and 50mls of medium). For a very nice soft sheet of paper you can use a solution of 1:9 (90mls water to 10mls medium). Experiment to be sure your paper has the durability and strength that your project requires. You can always add more medium, but you can’t remove it once it’s dry. If too little of the adhesive is used, the surface of the paper may appear hairy. Simply brush more adhesive on. Several thinner coats achieve a much better result than one heavy application. To add a new layer of silk paper to an existing piece, simply make up the new piece to be added and then glue it onto the existing paper using the acrylic gloss medium/varnish. The more water in the solution the more successful you will be at adding pieces. If possible, lay the new silk fibres directly onto the existing sheet. It is important to note that two fully dry pieces of silk paper made with the acrylic adhesive will not bond to each other – the medium is not a true ‘gluing’ agent.
Textile Medium (Jo Sonja’s Brand, Manufactured by Chroma Acrylics)
This adhesive is water-resisitant, hand washable and dry cleanable (reduced cycle, reduced moisture, 40 degrees Celsius). It can be used, within limits, for wearable art. The silk paper created with this medium is quite flexible and lustrous but has a slightly coated feel.
Apply as above, and follow manufacturer’s directions to heat set, ensuring proper bonding. Too little adhesive will allow the layers to bubble and possibly separate which may, or may not, be a problem depending on your use. Re-enforcement (decorative) stitching could be beneficial.
Some uses for this adhesive include belts, appliqué, and other accessories such as purses and hats. It is more flexible than the acrylic medium and therefore better to use in purses where you need the flaps to bend easily. It is very important in wearables that you test your products to ensure that they have the durability and washability that you need.
Use of Dry Mount for very smooth Silk Paper
Information contributed by Roxan Kinas, Barbados “We did make one astounding discovery. You should see/feel the effects of sticking a sheet of silk paper into a dry mount press. The dry mount, when adjusted to the right temperature and setting, is very low heat. The combination of this low heat with pressure can do amazing things. Most of these presses do not have very sophisticated settings so you will need to press the silk at the lowest setting, about 210 degrees, or the same setting as one would use for colour photographs. The combination of low heat with pressure eliminates all the screen markings, makes the product feel as smooth as glass, with no wrinkles, bumps or creases. It feels like heaven and is extremely strong. If you know any darkroom photographers, you must try this technique.”
Wallpaper Paste Containing Methyl Cellulose
Wallpaper paste with methyl cellulose traditionally is used for adhering rice and other cellulose wallpapers. There are many advantages to using wallpaper paste – it leaves the silk with a wonderfully natural handle, is a more natural product, is very forgiving (can be removed with water) and is great for using in felting. The disadvantages are that the pieces are not permanent (ie. the paste continually gains and releases atmospheric moisture) and are not at all waterproof (unless shellac or other varnishes are added afterwards).
The paste should be made up per directions on the package (please note there are hundreds of varieties on the market, you will just have to test a few). Try to buy one without the anti-fungal agents added. The paste should be relatively clear in appearance once thoroughly mixed up. Mix to a thick paste consistency. It can be thinned accordingly. For stiffer papers several thinner coats are always more desirable than one thick coating.
The wallpaper paste is fabulous for creating silk ‘pre-felts’. You can create the silk paper and then cut out elaborate designs (held together temporarily with the wallpaper paste) which can then be attached onto the wool as the paste washes out in the felting process.
Chemically, methyl cellulose is unstable because it is constantly absorbing atmospheric moisture and expanding microscopically. I have found that pieces which began quite stiff have loosened up over time and eventually the adhesive appears to almost disappear. For this reason it is recommended for use only when the piece will be under glass, heavily re-enforced with stitching or used in felting (in a similar manner to using pre-felt). Many people have had greater success with its permanence than I have, so once again – please experiment.[/toggle][toggle title=”Making Temporary Silk Paper for Felting”]
Temporary Silk Paper for Felting
This method is a very fast, simple and effective way of creating a temporary piece of silk paper for using in feltmaking. It is a way which to introduce more intricate and detailed elements in silk, other than the traditional ‘swish and swirl’ layout. After your design has been created with the silk paper it will then be laid on top of the wool and then felted together. During the felting process the spray starch washes out iand the wool permanently grabs the silk paper.
In the past, I recommended using the pump spray bottle of Fabulon spray starch but have subsequently found it to be expensive, smelly and contains a lot of chemicals unpleasant to work with. Lately, I have been using good old fashioned powdered Box Laundry Starch (per instructions on the box) that you dissolve with boiling water and put into a spray bottle. My mix is a little bit stronger than recommended on the box to give the paper a bit more firmness (if needed).
Remember a starch solutions is only temporary, it will wash wash away during the felting process and by then the wool fibres will have grabbed the silk and bonded it to the wool.
Addendum: (as of Sept 2020) I have found powdered Box Laundery Starch difficult to find in the grocery stores. So with a bit more investigating, I discovered that most box starch is simply Cornstarch. Other powder starches can also work include: Wheat based starch or Rice based starch. Since Cornstarch is cheap, very easy to prepare and readily available, I decided to work with it.
CORN STARCH SOLUTION:
- Dissolve 1 tablespoon powder into 1 cup cold water, stir to dissolve lumps
- Bring to a boil while stirring
- Cool
- Add 1 cup water to mixture to create desired thinness (or more for thinner paste).
Making Temporary Silk Paper
Read the above instructions for ‘How to Begin’
Next, you will be laying down your silk on top of a sheet of grease proof paper (wax paper) – I find you need a fairly heavy brand of paper (Glad Bake and cooking paper works well for me). Now lay out your silk and spray with starch until it is relatively wet. Then over-lay the silk with another piece of grease proof paper. Through the paper, smooth out the wet areas in the silk until the starch is evenly distributed and all is wet (re-spray if necessary). Use a dry iron on a very hot setting, iron until dry. I used to recommend using the silk setting on your iron, but it is too time consuming. I don’t believe that a higher heat setting applied through the paper harms the silk. When the silk is completely dry (it takes longer than you think – if it doesn’t peel away VERY easily from the paper it probably isn’t dry enough, keep ironing) peel the silk paper away. That’s it! If the silk appears fluffy, repeat the process as many times as necessary.
Using Seri Silk Tops for Temporary Silk Paper
There are two very easy ways to work with the Seri Silk tops. One is to fan a cut length of top out sideways creating a cobweb-like effect. The other is to create Pencil roving by stripping it down lengthwise and dipping in soapy water. Click here to view our Video on how to work with the Seri Silk. We recommend viewing this video before proceeding.
- First, lay down a sheet of grease proof paper (wax paper) – I find you need a fairly heavy brand of paper (Glad Bake and cooking paper works well for me).
- Secondly, carefully fan out your Seri Silk onto the grease proof paper creating a design. Then spray with starch until it is relatively wet. To create an interesting effect I like to layer up two or three colours on top of each other.
- Lately I have been using good old fashioned powdered Box Laundry Starch that you dissolve with boiling water and put into a spray bottle. Follow instructions on the box. Mix accordingly, but some experimenting maybe be necessary to make it thicker or thinner depending on the results you are after. Remember this solution is only temporary, it will wash wash away during the felting process but by then the wool fibres will have grabbed the silk and bonded it to the wool.
- In case you can’t find Box Starch you can use my above recipe for using Cornstarch.
- Lastly, over-lay the silk with another piece of grease proof paper. Through the paper, smooth out the wet areas in the silk until the starch is evenly distributed and all is wet (re-spray if necessary). Use a dry iron on a very hot setting and iron until dry. I used to recommend using the silk setting on your iron, but it is too time consuming. I don’t believe that a higher heat setting applied through the paper harms the silk. When the silk is completely dry (it takes longer than you think – if it doesn’t peel away very easily from the paper it probably isn’t dry enough, keep ironing) then peel the silk paper away. That’s it! If the silk appears fluffy, repeat the process as many times as necessary.
- If you want to create Seri Silk Paper with the Pencil Roving, the roving will be wet from the soapy dipping. Create your design on the grease proof paper, then spray with the starch and iron dry as above. It will take a bit longer to iron the silk dry since you started with very wet silk. Re-apply more starch if needed and iron dry.
- Your Seri Silk Paper designs can now be used in your feltmaking. Make sure where ever you lay down your silk design there is wool present, because ultimately it is the wool that bonds (felts) and holds the silk together.
Fan out the Seri Silk Tops sideways
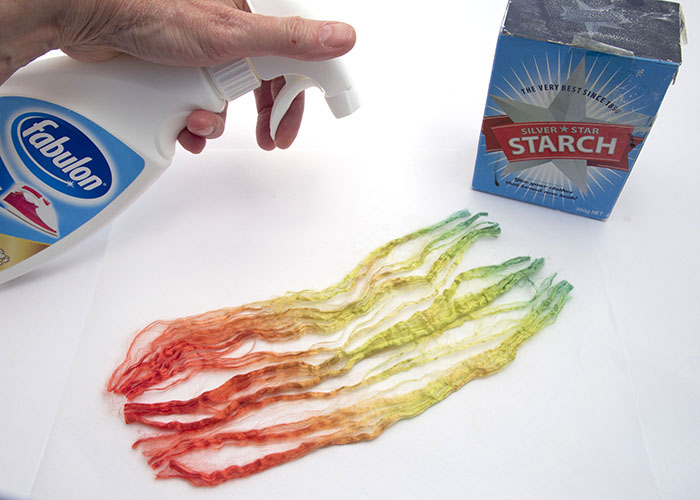
Spray till wet with Fabulon Spray Starch or Box Starch
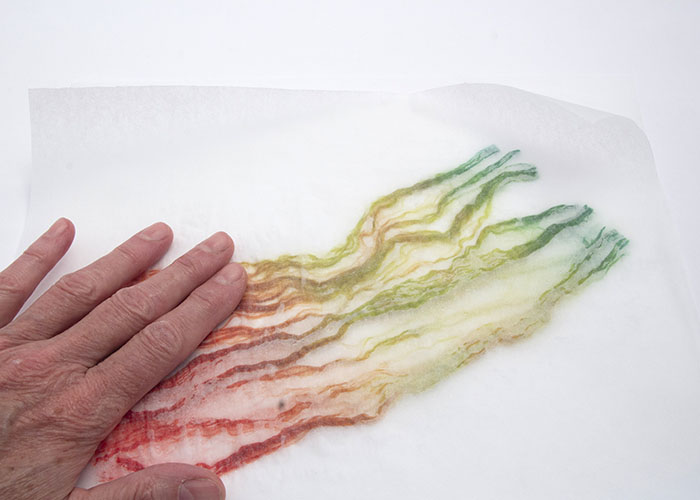
Cover silk with a sheet of grease proof paper and rub to distribute moisture
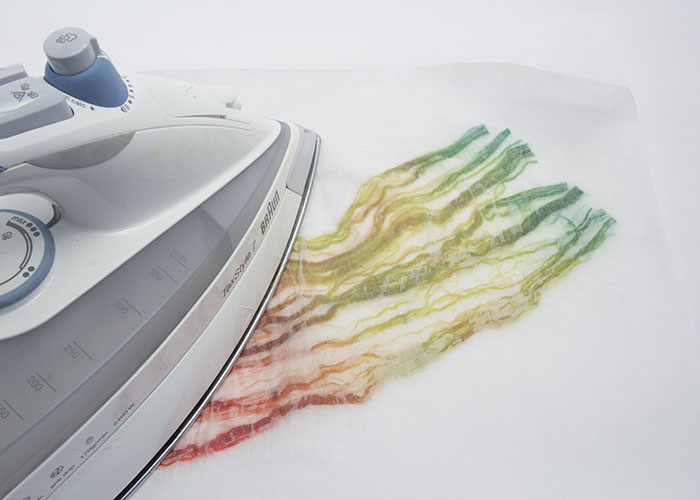
Iron till completely dry and silk easily comes away from the paper
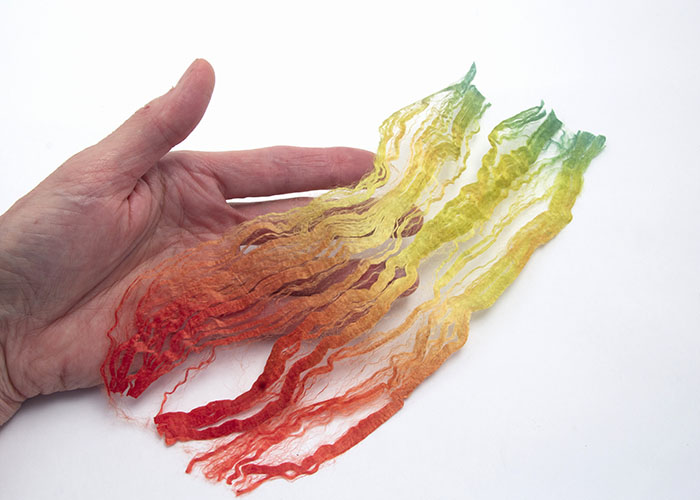
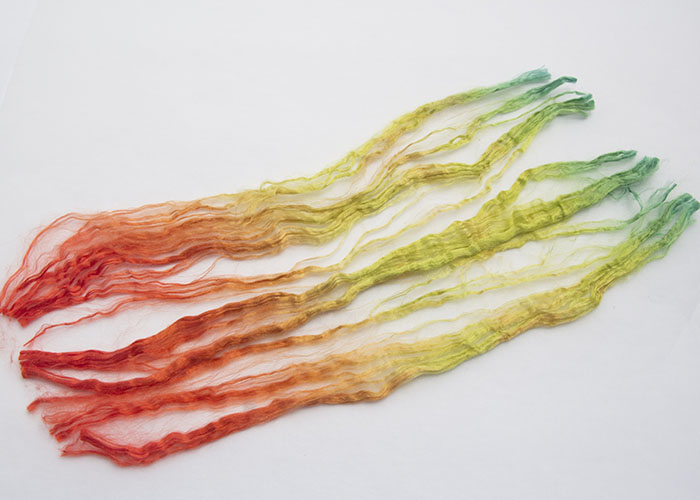
You now have a sheet of Seri Silk Paper

You can layer different colours together, re-starch if needed
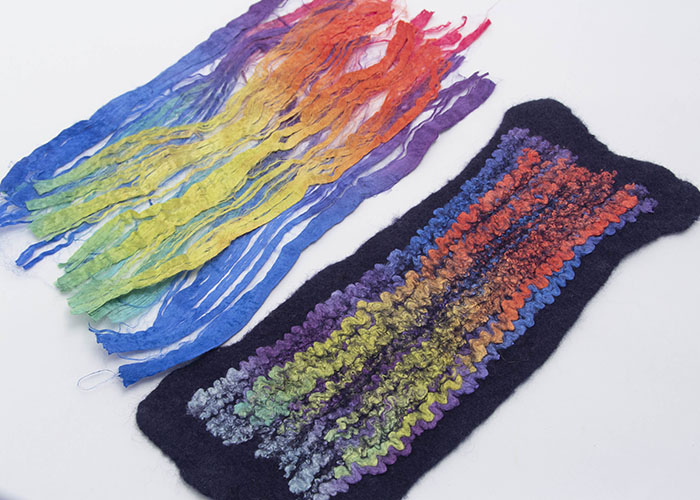
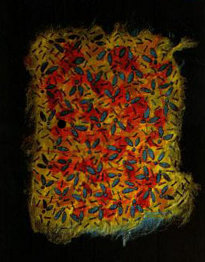
Seri Silk Paper felted to wool
[/toggle][toggle title=”Conclusion and Resources”]
In Conclusion
Silk paper is an exciting new and unique medium for designing with silk. Because it has not been spun or woven first the paper’s lustre is intensely alluring and its surface texture can be manipulated in a variety of ways – scrunching, moulding, stitching etc. You can virtually paint with the silk paper, create sculptural pieces or design wearable art pieces – its diverse applications are virtually unexplored. Experiment with the various adhesives to obtain the feel and affect you want and most of all – have fun! For more details, see the book Silk Paper Creations by Judith Pinnell.
Bibliography
Source for Dyed Silk Tops and Adhesives
Treetops Colour Harmonies
6 Benwee Road, Floreat, Western Australia 6014
Telephone: +61 8 9387 3007
Fax: +61 8 9387 1747
Email: orders@treetopscolours.com.au
https://www.treetopscolours.com.au/
Adhesive Mediums
Chroma Acrylics Inc.
Email: sales@chromaonline.com
http://www.chromaonline.com/
Australia
Chroma Acrylics Pty Ltd
17 Mundowi Road, Mount Kuring-Gai, New South Wales 2080
Telephone: +61 2 9457 9922
http://www.chromaonline.com/
USA
Chroma Inc USA
205 Bucky Drive, Lititz, Pensylvania 17543
Telephone: +1 717 626 8866
Email: infousa@chromaonline.com
http://www.chromaonline.com/
New Zealand
Draw Art Supplies
5 Mahunga Drive, Mangere, Auckland, New Zealand 2022
Telephone: +64 9 636 4989
www.draw-art.co.nz
United Kingdom
Chroma Europe Ltd PO Box 84, Bolton, United Kingdom BL19Rl
Telephone: + 00 44 1204 850213
Email: salesuk@chromaonline.com
http://www.chromaonline.com/[/toggle][/accordion]
Copyright – How to Create Silk Paper by Nancy Ballesteros