Instructions for Nuno Ruffled Scarf by Nancy Ballesteros
These simple instructions will lead you step by step through nuno felting an elegant Ruffled Scarf using Paj silk fabric, Superfine Merino wool and a bit of Silk Throwsters Waste. You have the option of felting a single Ruffled Scarf (Option A) or putting two slightly different shaped scarves together to create the effect shown in the photo on the right (Option B). Option A – Instructions for making one Ruffled Scarf which has a finished length of ~1.2 metres (~1.3 yards). Option B – Instructions for making two Ruffled Scarves. The first scarf is made from Option A. The second scarf will be slightly longer (~1.5 metres) (~1.6 yards) and folded in a different manner. The two scarves are laid out and felted at the same time. When finished they are sewn together at the centre back neck. Both scarves have a 1.5% shrinkage rate, or around 30%. [accordion] [toggle title=”Materials List – Metric”]Option A – Single Ruffled Scarf
- Silk Fabric: 1.8 metre long x ~38 cm wide. If using 114 cm wide fabric this equates to tearing the width into 1/3’s. We recommend using a fine Paj silk fabric (~5 momme) or Tissue silk fabric (~4.5 momme).
- Wool tops: ~5 – 10 gms Superfine Merino Wool Tops. Treetop’s wools 1 metre = 25 gms.
- Silk Throwsters Waste: ~ 5 gms. Other decorative silk fibres or threads can be used.
- Painter’s Plastic or Bubble Wrap: Choose between using thin painter’s plastic, bubble wrap or if you prefer you can use both at the same time. Measurements ~ 75 cm wide x 2.75 metres long.
- Netting (tulle): ~ 75 cm wide x 2.75 metres long.
- PVC Pipe or Pool Noodle: ~ 75 cm wide.
- Olive Oil Soap: Grated and dissolved with hot water. Put this in an old milk bottle and poke tiny holes in the lid with a hot needle to make a watering can.
- Non slip matting or old towel: Do your rolling on top of this so it doesn’t slip around on the table.
- Glass Wash Board OR firm pool bubble wrap: To use in the last stages of fulling. If possible also purchase a large baking tray and fit the pool bubble wrap inside the tray so the water doesn’t continually escape (650L x 450W x 25H mm – sourced from catering supply companies).
- Bucket and old towels.
Option B – Two Ruffled Scarves One scarf differs from the other in length and the way in which they are folded. The finished scarves are hand-stitched together at the back of neck. Each scarf can be made from the same or differing fabrics types or colours.
- Silk Fabric: Cut one piece of silk fabric 2.25 metre long x ~38 cm wide and a second one 1.8 metre long x ~38 cm wide (same as Option A). If using 114 cm wide fabric this equates to tearing the width into 1/3’s. We recommend using a fine Paj silk fabric (~5 momme) or tissue silk fabric (~4.5 momme).
- Wool tops: ~15 – 20 gms Superfine Merino Wool Tops. Treetop’s wool 1 metre = 25 gms.
- Silk Throwsters Waste: ~ 5 gms. Other decorative silk fibres or threads can be used.
- Painter’s Plastic or Bubble Wrap: Choose between using thin painter’s plastic, bubble wrap or if you prefer you can use both at the same time. Measurements ~ 75 cm wide x 2.75 metres long.
- Netting (tulle): ~ 75 cm wide x 2.75 metres long
- PVC Pipe or Pool Noodle: ~ 75 cm wide.
- Olive Oil Soap: Grated and dissolved with hot water. Put this in an old milk bottle and poke tiny holes in the lid with a hot needle to make a watering can.
- Non slip matting or old towel: Do your rolling on top of this so it doesn’t slip around on the table.
- Glass Wash Board OR firm pool bubble wrap: To use in the last stages of fulling. If possible also purchase a large baking tray and fit the pool bubble wrap inside the tray so the water doesn’t continually escape (650 x 450 x 25 mm – sourced from catering supply companies).
- Bucket and old towels [/toggle] [toggle title=”Materials List – Imperial (USA)”]Option A – Single Ruffled Scarf
- Silk Fabric: 70 inch long x ~15 inch wide. If using 45 inch wide fabric this equates to tearing the width into 1/3’s. We recommend using a fine Paj silk fabric (~5 momme) or Tissue silk fabric (~4.5 momme).
- Wool tops: ~.18 – .35 ounce of Superfine Merino Wool Tops.
- Silk Throwsters Waste: ~ .18 ounce. Other decorative silk fibres or threads can be used.
- Painter’s Plastic or Bubble Wrap: Choose between using thin painter’s plastic, bubble wrap or if you prefer you can use both at the same time. Measurements ~ 30 inch wide x 108 inch long.
- Netting (tulle): ~ 30 inch wide x 108 inch long.
- PVC Pipe or Pool Noodle: ~ 30 inch wide.
- Olive Oil Soap: Grated and dissolved with hot water. Put this in an old milk bottle and poke tiny holes in the lid with a hot needle to make a watering can.
- Non slip matting or old towel: Do your rolling on top of this so it doesn’t slip around on the table.
- Glass Wash Board OR firm pool bubble wrap: To use in the last stages of fulling. If possible also purchase a large baking tray and fit the pool bubble wrap inside the tray so the water doesn’t continually escape (26Lx 18W x 1H inch) – sourced from catering supply companies).
- Bucket and old towels.
Option B – Two Ruffled Scarves One scarf differs from the other in length and the way in which they are folded. The finished scarves are hand-stitched together at the back of neck. Each scarf can be made from the same or differing fabrics types or colours.
- Silk Fabric: Cut one piece of silk fabric 88 inch long x ~15 inch wide and a second one 70 inch long x ~15 inch wide (same as Option A). If using 45 inch wide fabric this equates to tearing the width into 1/3’s. We recommend using a fine Paj silk fabric (~5 momme) or tissue silk fabric (~4.5 momme).
- Wool tops: ~0.5 – 0.7 ounce Superfine Merino Wool Tops.
- Silk Throwsters Waste: ~ 0.18 ounce. Other decorative silk fibres or threads can be used.
- Painter’s Plastic or Bubble Wrap: Choose between using thin painter’s plastic, bubble wrap or if you prefer you can use both at the same time. Measurements ~ 30 inch wide x 108 inch long.
- Netting (tulle): ~ 30 inch wide x 108 inch long.
- PVC Pipe or Pool Noodle: ~ 30 inch wide.
- Olive Oil Soap: Grated and dissolved with hot water. Put this in an old milk bottle and poke tiny holes in the lid with a hot needle to make a watering can.
- Non slip matting or old towel: Do your rolling on top of this so it doesn’t slip around on the table.
- Glass Wash Board OR firm pool bubble wrap: To use in the last stages of fulling. If possible also purchase a large baking tray and fit the pool bubble wrap inside the tray so the water doesn’t continually escape (26Lx 18W x 1H inch) – sourced from catering supply companies).
- Bucket and old towels.
[/toggle] [toggle title=”How to begin – Option A”] Take your 38 cm (15 inch) wide piece of fabric and fold in both edges approximately 9 cm (3.5 inches) towards the middle, leaving a 2-3 cm (0.8-1.2 inch) space in the middle. Iron the folds flat along the scarf (you don’t have to but it’s much easier to work with) (see Figure 1).
 Figure 1
Lay this folded scarf on top of your bubble wrap or alternatively you can lay it on top of a thin piece of painter’s plastic. You will now be using the wool to fill in the middle space. Make sure to cover the edges of the folded fabric. Don’t be too heavy handed with the wool, ~ 5 – 10 gms (~.18 – .35 oz) should cover the entire length of the scarf. Lay the wool longwise along the length of the scarf with maybe a few pieces of wool going crosswise now and again (this is an optional design feature). You are looking to have the scarf shrink mostly lengthwise, so this is the direction in which you lay the majority of the wool fibres (see Figure 2). Remember that the wool now needs to travel through two layers of silk fabric to felt, so don’t lay it too light either.
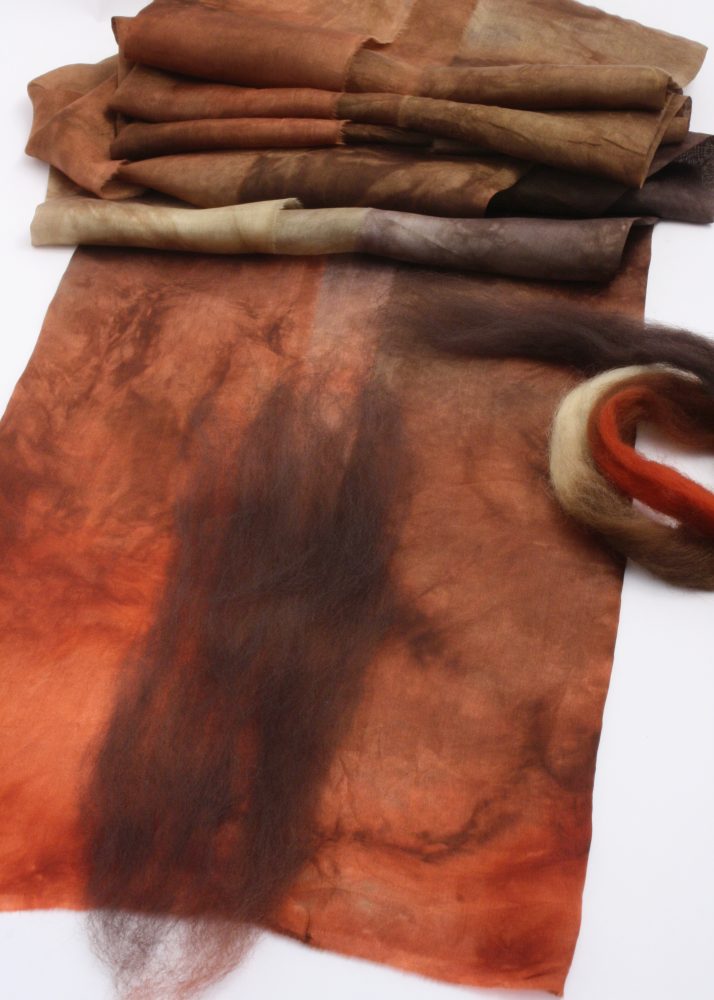 Figure 2
Finally decorate the top of the wool with long strands of Silk Throwsters Waste (or other types of silk fibres) (see Figure 3).
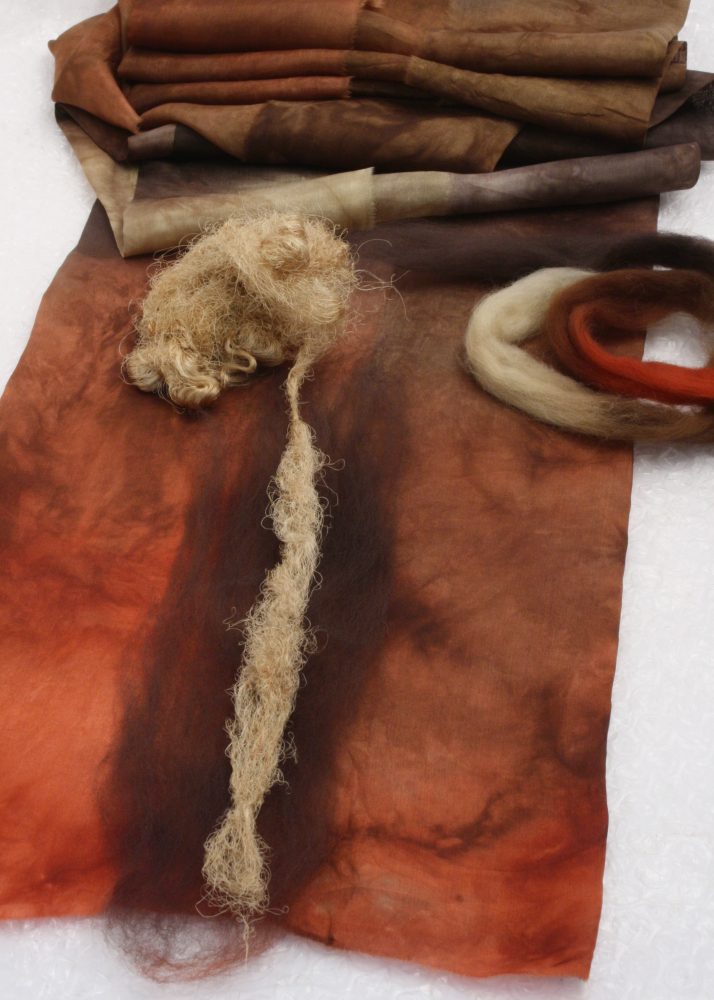 Figure 3
Those using Option A and felting only one scarf should now skip down to “Wetting out the Fibres” section and continue with the instructions. [/toggle] [toggle title=”How to Begin – Option B”] First complete the above Option A instructions for laying out your first scarf. Next, follow the below instructions for laying out your second scarf. The second scarf will be slightly longer and folded in a different manner. Start with the longer fabric (2.25 metres long x 38 cm wide (39 x 15 inch) and fold in one edge 2/3’s of the way across. (13cm) (5 inch) will now be left unfolded). Next take the remaining edge and fold this in to meet the other folded-in edge (see Figure 4). Iron these folds flat. Place the second scarf next to the Option A scarf on the bubble wrap or plastic. 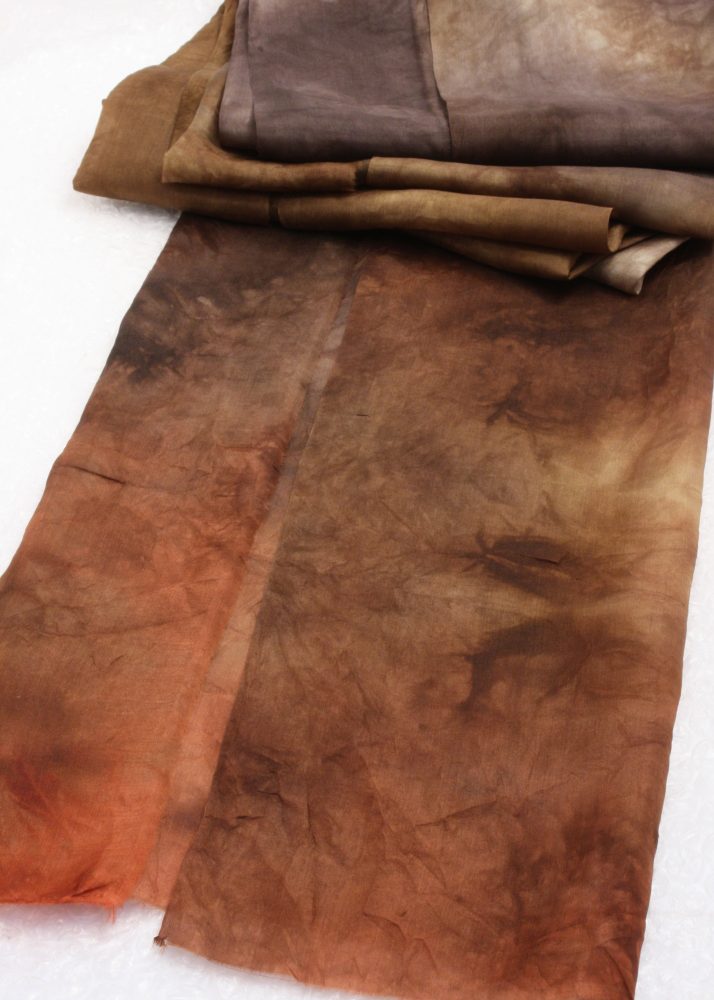 Figure 4
Next, where the two folded-in edges meet, lay ~ 1 cm (~0.4 inch) width of wool down the entire length of the scarf. (see Figure 5). Remember that the wool now needs to travel through four layers of silk fabric to felt, so don’t lay it too light. 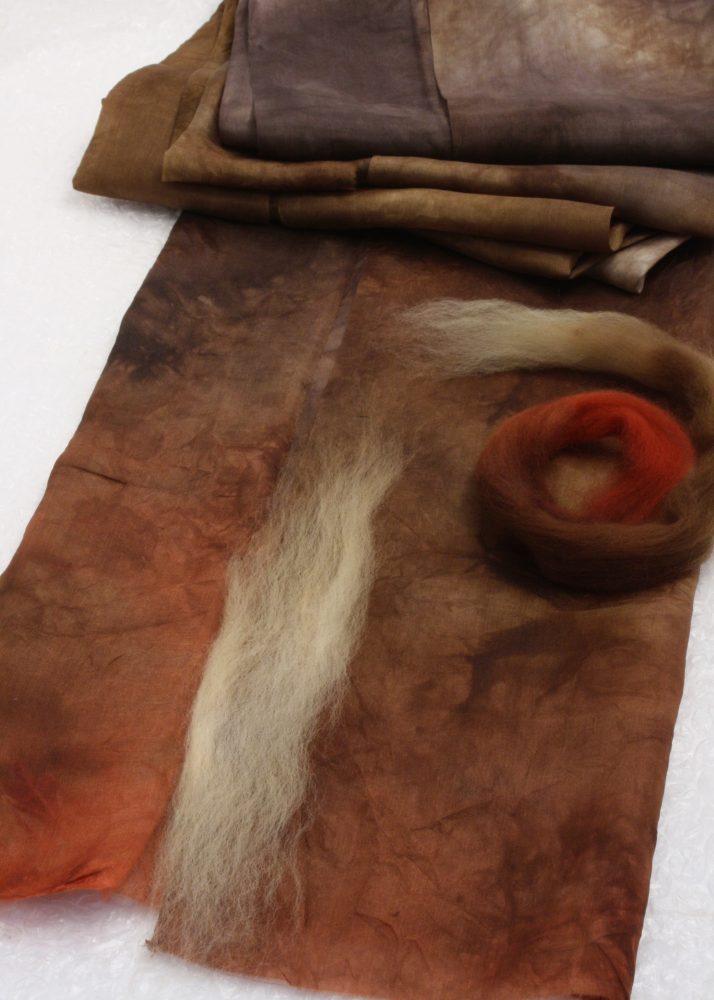 Figure 5
Now fold the smaller folded-in section of the scarf on top of the larger section so that the wool you just laid down is sandwiched inside a new fold (see Figure 6). No wool should now be showing. Make sure the wool is tucked neatly into the new fold so as to leave some fabric free to form a ruffled edge.
 Figure 6
The two scarves will now be wet-out and rolled at the same time. [/toggle] [toggle title=”Wetting Out the Fibres”] Cover your scarf(ves) with net and wet out using cool soapy water (see Figure 7). I like to grate a couple of spoonful’s of olive oil soap into a milk jug and dissolve with a bit of boiling water, then fill the rest of the bottle with cool water. Try using a hot needle to punch small holes in the lid of the milk bottle to make a watering can. Do not use warm or hot water at this initial stage as it will felt the wool too fast before it has had time to migrate through the fabric.
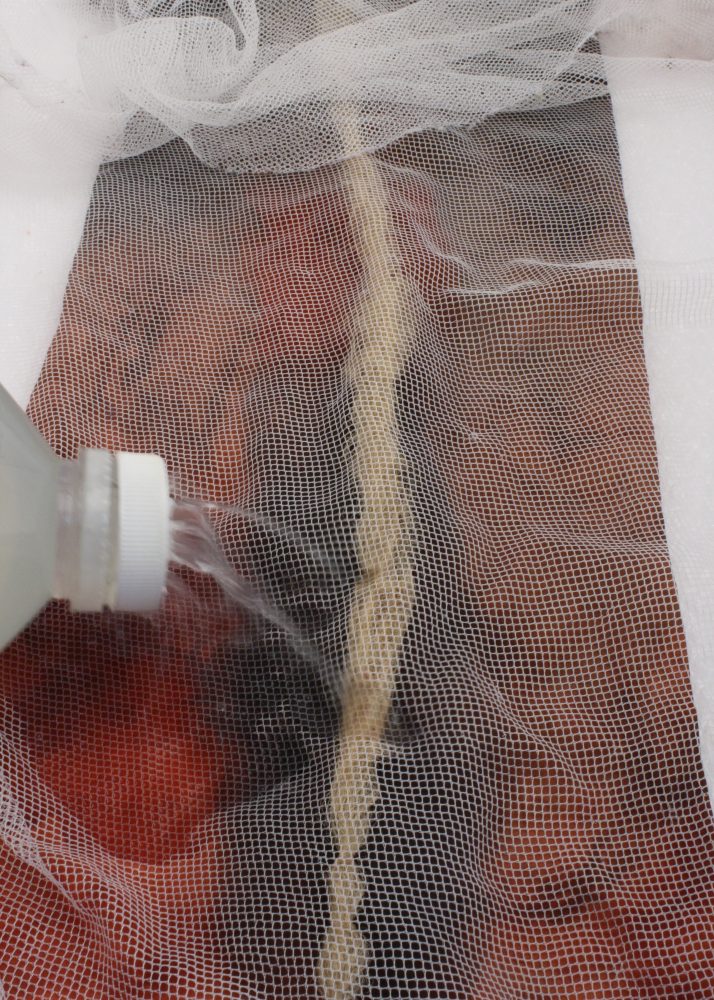 Figure 7
Once wet, remove the netting and roll up your work in the plastic or the bubble wrap. My favorite is to use both. First lay down the bubble wrap then the wetted out scarf which is then covered with the painter’s plastic. I feel this just helps to keep in the moisture. You may like to use the no-roll method described on this website(Click here) or you may now roll up your work around a pvc pipe or pool noodle. Once rolled up I usually place this roll in a towel and use a non-slip mat on the table top. You are now ready to commence the hardening (rolling) phase. [/toggle] [toggle title=”Hardening (Rolling) Phase”] The hardening part of feltmaking is commonly referred to as rolling. Start rolling the sausage back and forth being careful to move your hands up and down the sausage so all parts get equal attention. You need to roll ~200 times before unrolling the whole thing and rolling it up from the other end. This should take about 5 to 10 minutes. It is important to keep unrolling and rolling from either end to make sure everything felts evenly. Use these opportunities to straighten any creases in your work as you go. Some people are more vigorous and heavy with their rolling and this may result in a faster felting process and will require more frequent checking. After about 1500 rolls (20-30 minutes), all the fibres should have migrated through the fabric and begun to matt together reaching the pre-felt stage. There should be a little shrinkage at this stage, the fabric is beginning to pucker as the wool shrinks and pulls it in. All the fibres should have worked their way through the weave of the fabric and be firmly attached. The silk fibres added as decoration should be secured to the wool fibre and also be a little wiggly from the wool shrinking. If all these things have not happened, continue rolling. [/toggle] [toggle title=”Fulling (Tossing) Phase”] Now it’s time for the fulling (tossing) phase. I usually work with one scarf at a time, but during some of the initial tossing you can work with both scarves. Squeeze out the excess cold water and submerse it into a bucket of warm soapy water. Gently squeeze out just enough water so that it feels a bit heavy and soapy. Never let your work become dry or not feel slightly soapy. Begin by tossing the scarf onto the table or preferably onto pool bubble wrap sitting in a tray. Pick it up and gently dropping it down (see Figure 8). Toss gently at first, then more vigorously as you continue. Keep an eye on the edges, pulling them out if they start to felt into back on themselves. As the wool becomes firmer start to stretch your piece every 20 or so tosses, pulling in all directions. This will aid in creating better drape and better felt. Continue to toss your work, periodically warming it with warm soapy water. Warmth and lubrication help in the felting process
.  Figure 8
As you continue tossing your work, notice it beginning to shrink. You should continue the tossing process until the scarf has shrunk at least 30%. The more you toss, the more it will shrink and the better it’s texture. [/toggle] [toggle title=”Final Fulling – Glass Washboard”] I always finish my felt off by using a glass washboard or hard pool bubble wrap is the next best thing. It is an easy way to achieve a beautifully scrunched and well felted finish. The fibres will compact (shrink) considerably more than by just tossing. Simply glide (not scrub!) the scarf over the ridges of a glass washboard with the aid of lots of soapy warm water (see Figure 9). Continually add warm soapy water while gliding over all areas of the scarf until the surface is well felted and shrunk to the desired length.
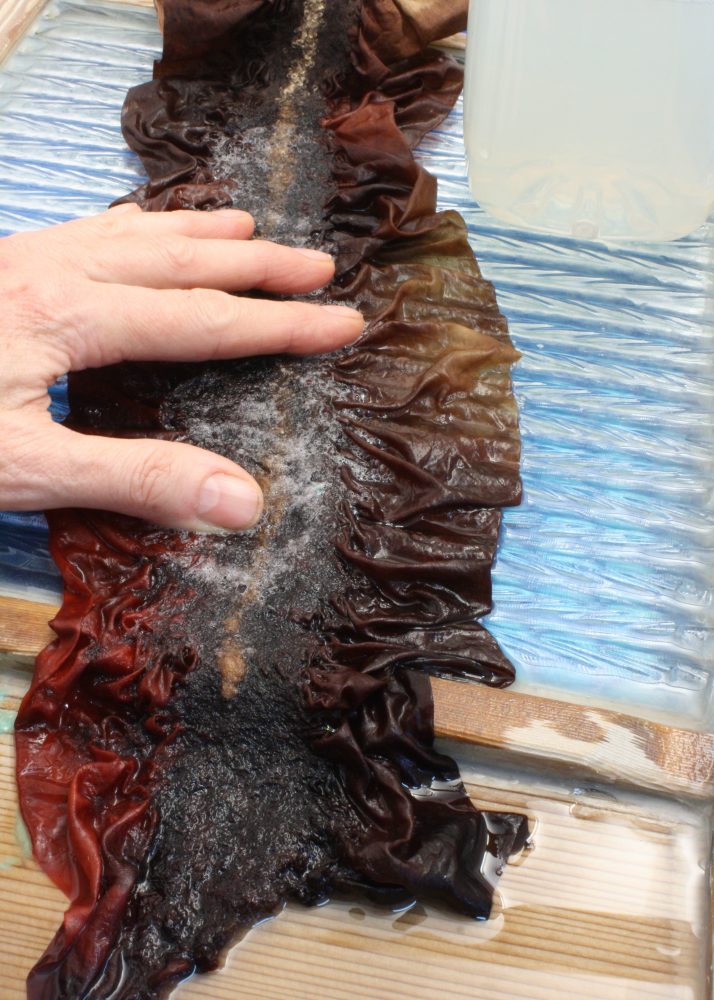 Figure 9
The following items can also be used for fulling but aren’t quite as effective as a glass washboard: the ridges on the top of plastic storage boxes, a plastic paint roller tray, hard pool bubble wrap, or failing that the ridges on the drain board of your sink. [/toggle] [toggle title=”Finishing Techniques”] When you are happy that your project is well hardened and fulled (see Figure 10, 11, 12), rinse out all the remaining soap with tepid water and roll up in a dry towel to remove excess moisture. Shake the scarf to fluff the ruffles, stretch out any wrinkles in the fabric. Then hang over a cloth line or door to dry.
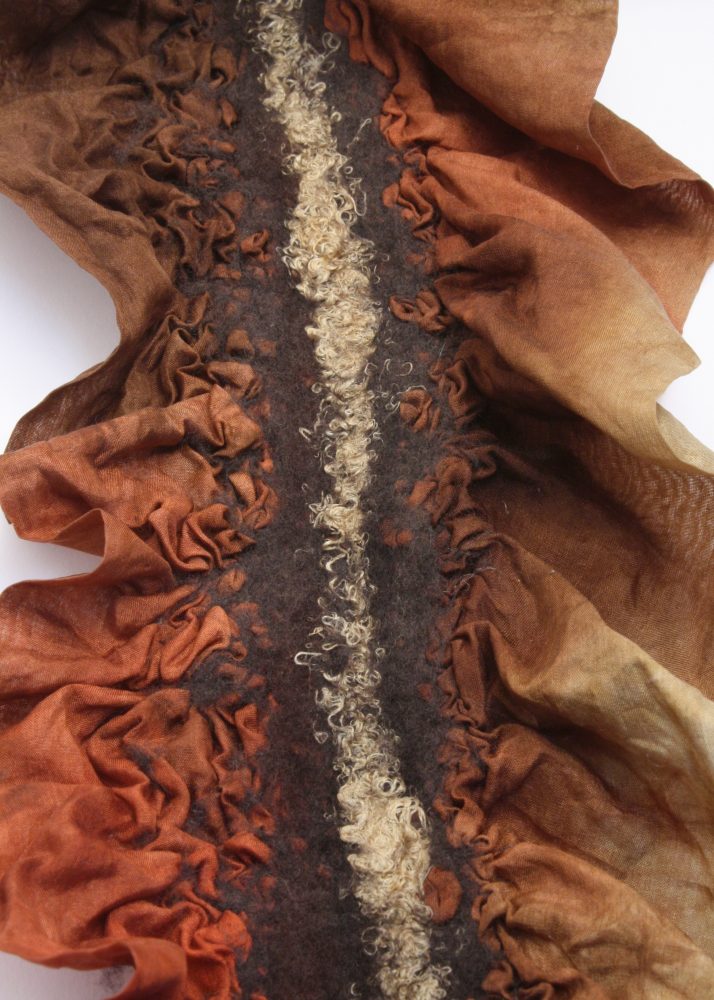 Figure 10
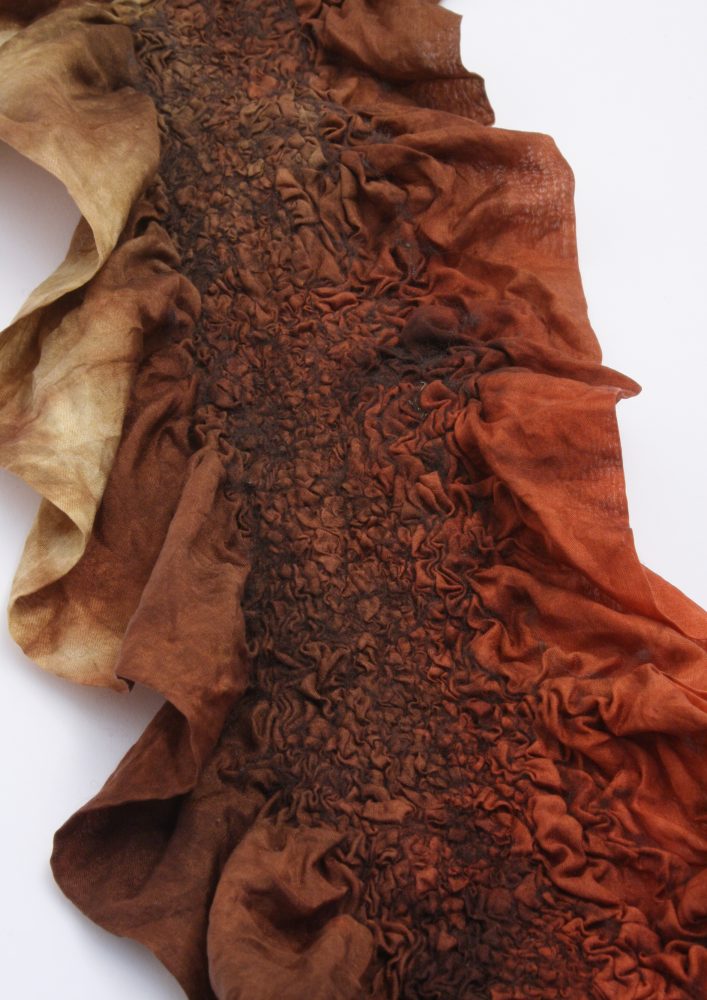 Figure 11
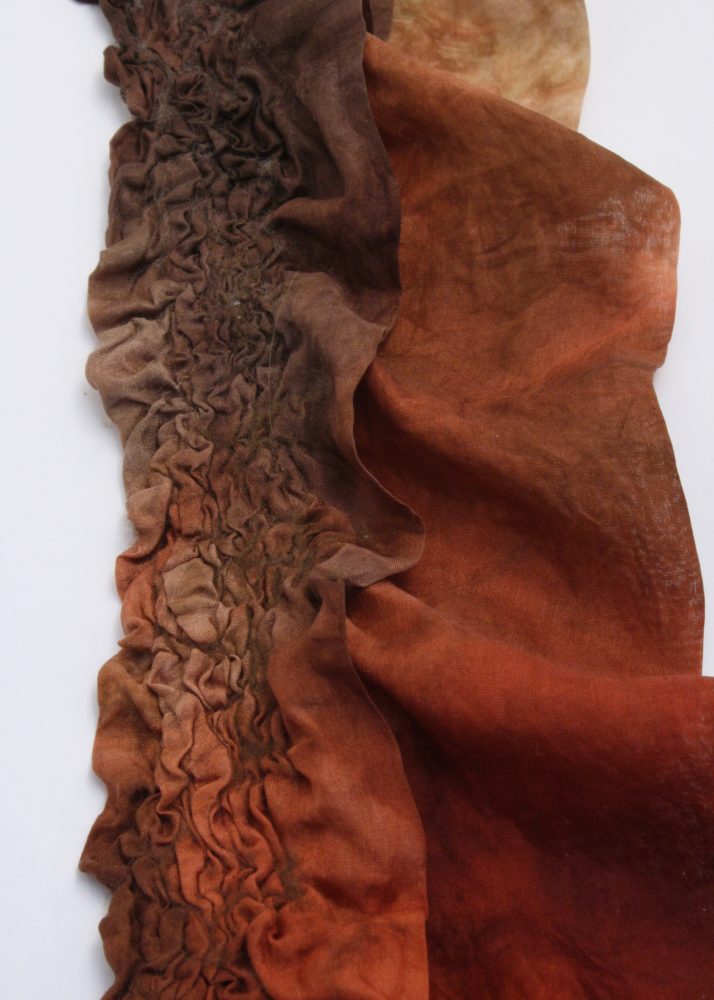 Figure 12
When dry for Option B, hand sew the two scarves together at the back neck (see Figure 13).
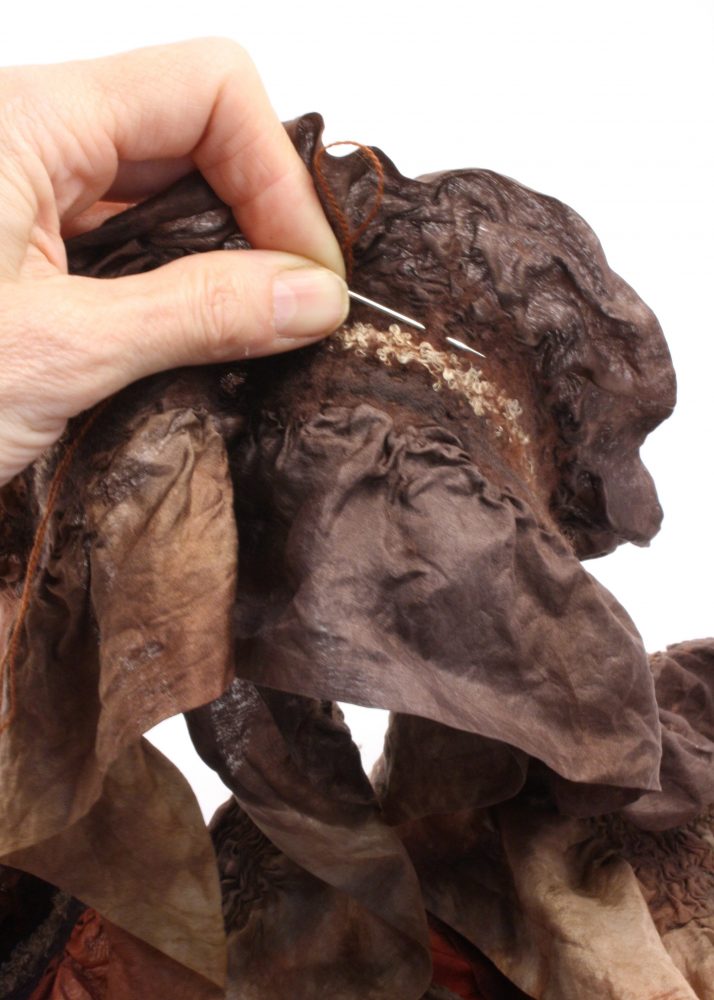 Figure 13 [/toggle][/accordion]
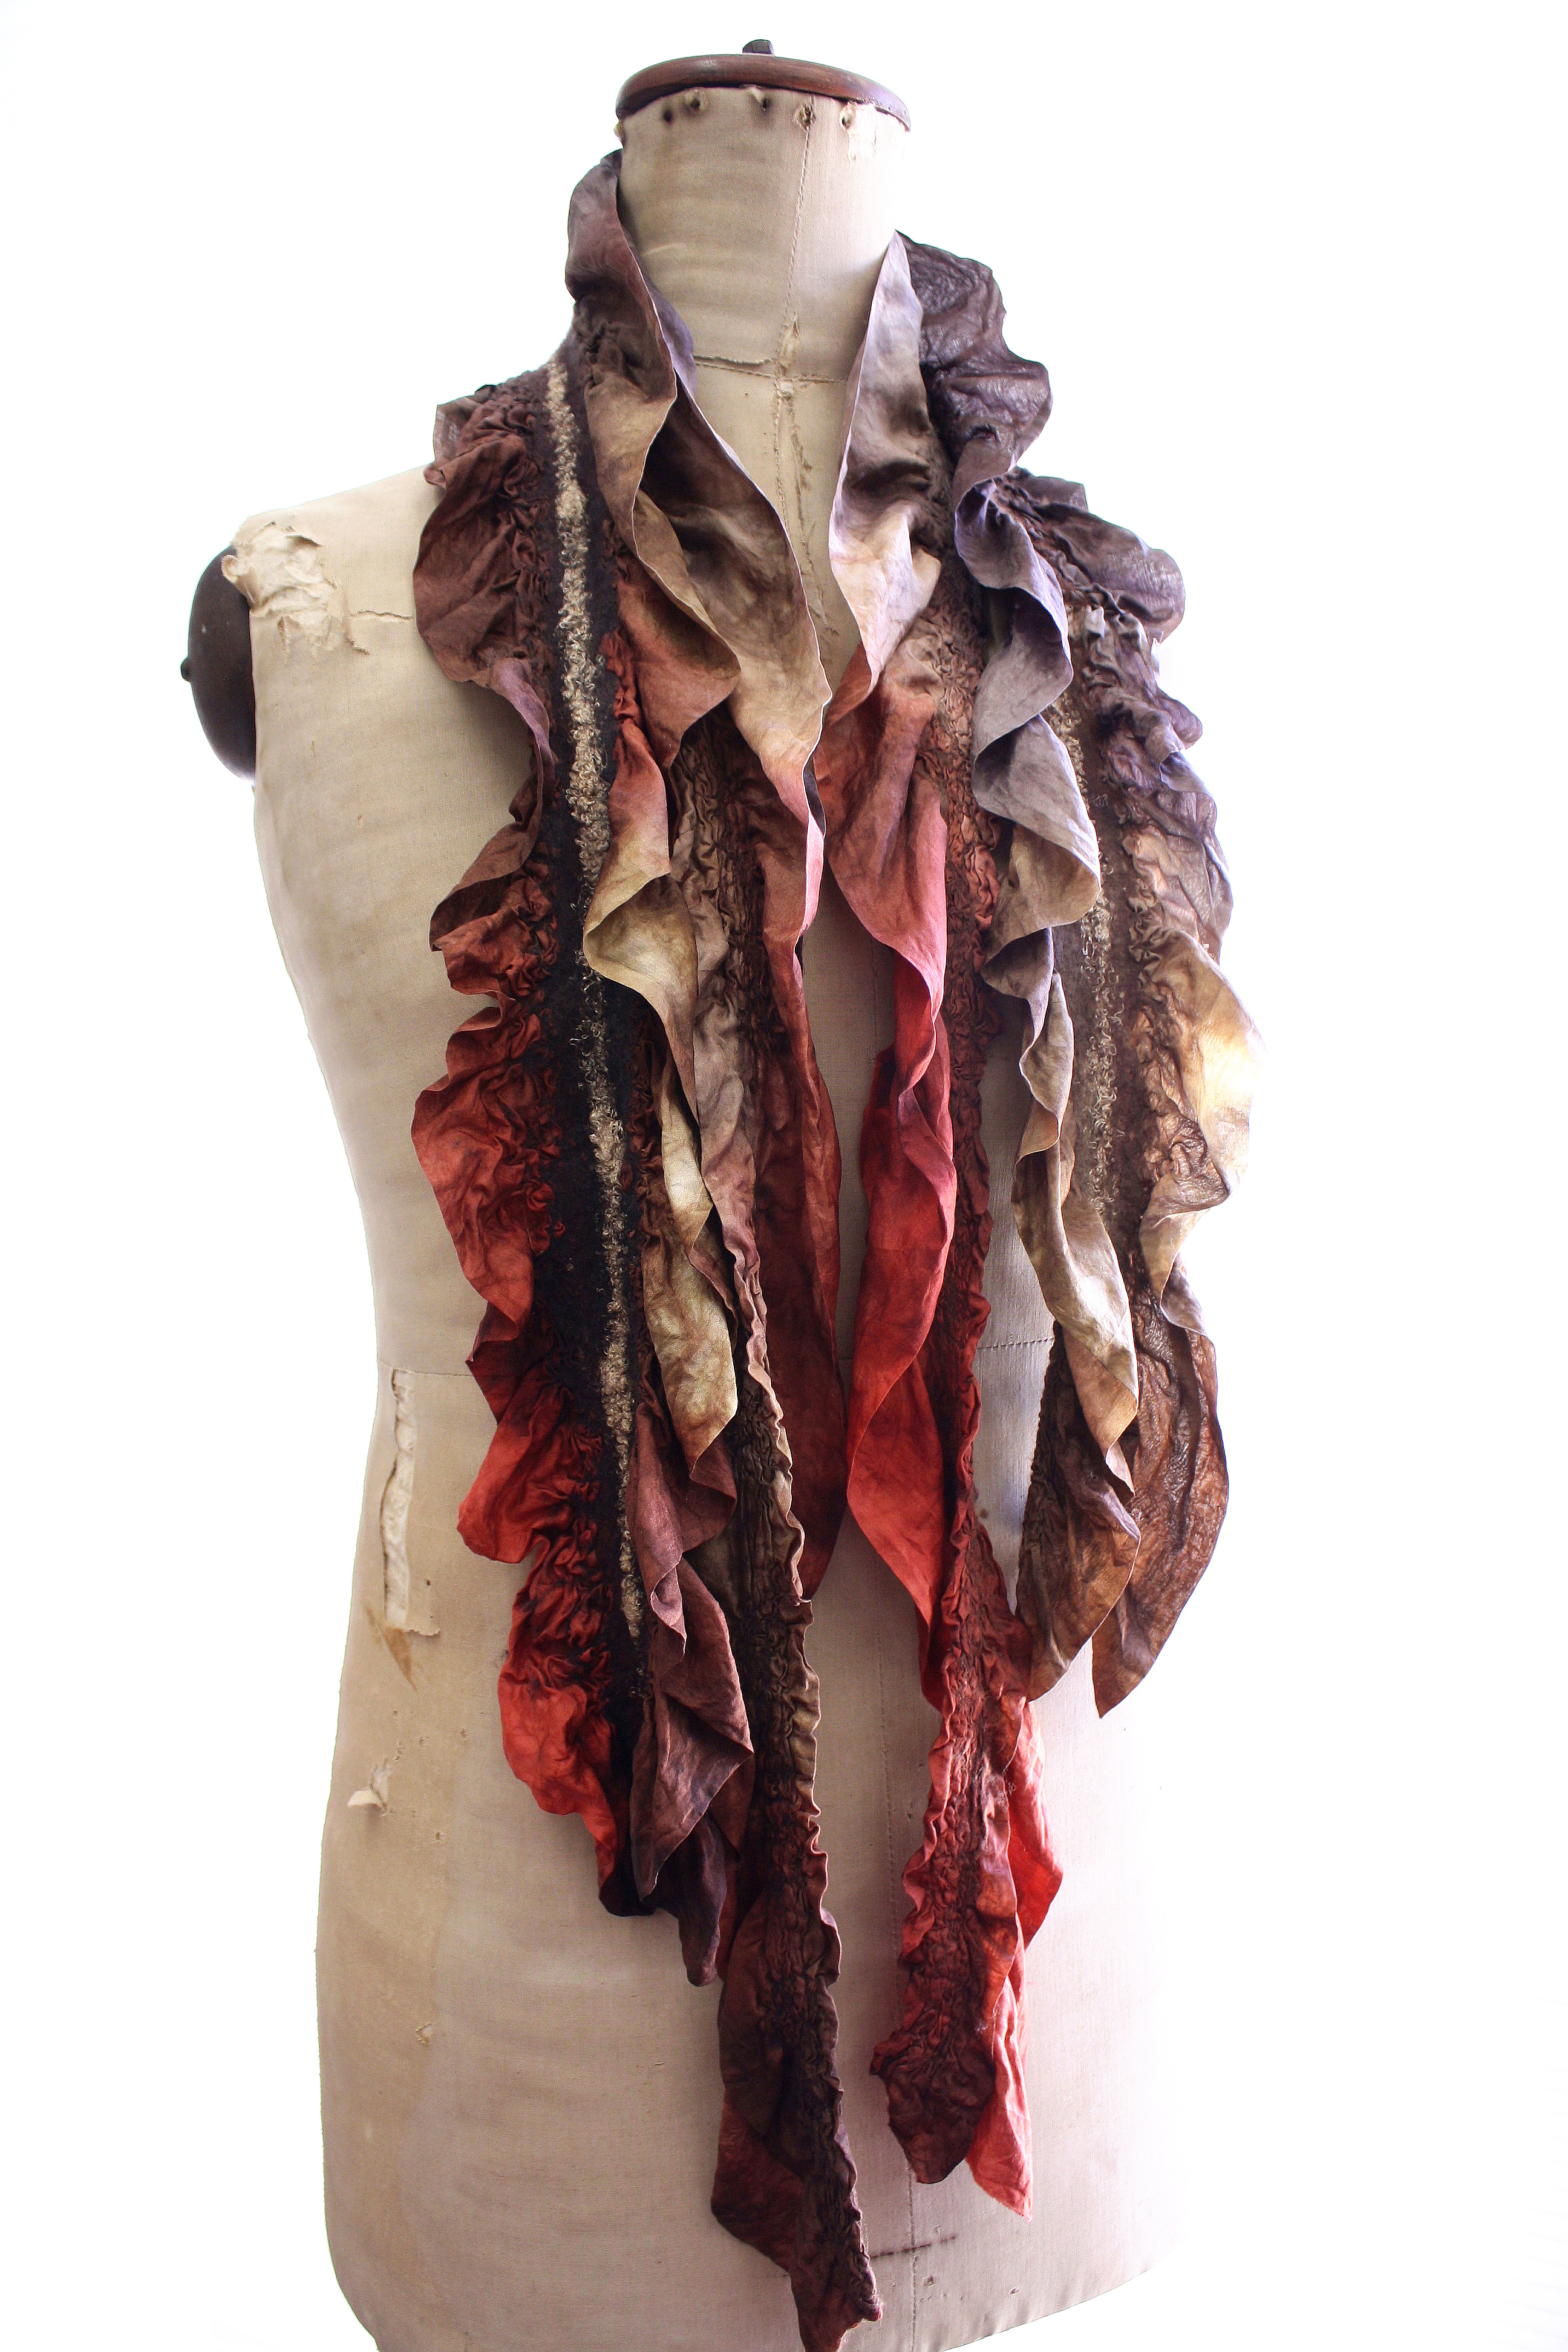 Ruffled Scarf